Getting Started as an Artist
This guide will help you get started and understand the Kitsu's key features as an artist.
1. Initial Profile Setup & Customization"
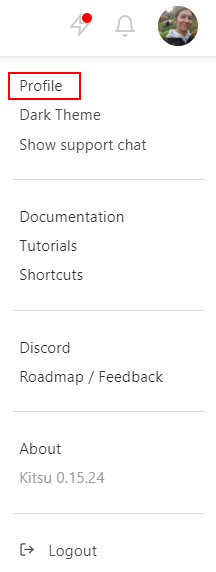
On your first connection, we encourage you to fill in your contact information into your profile. Click on your name on the top right of the screen (1), then on Profile (2).
NB: A link to this Documentation is available (4), and you can switch to the Dark Theme in this menu, too (3). You can also jump on our Slack (5) or look at our roadmap (6).
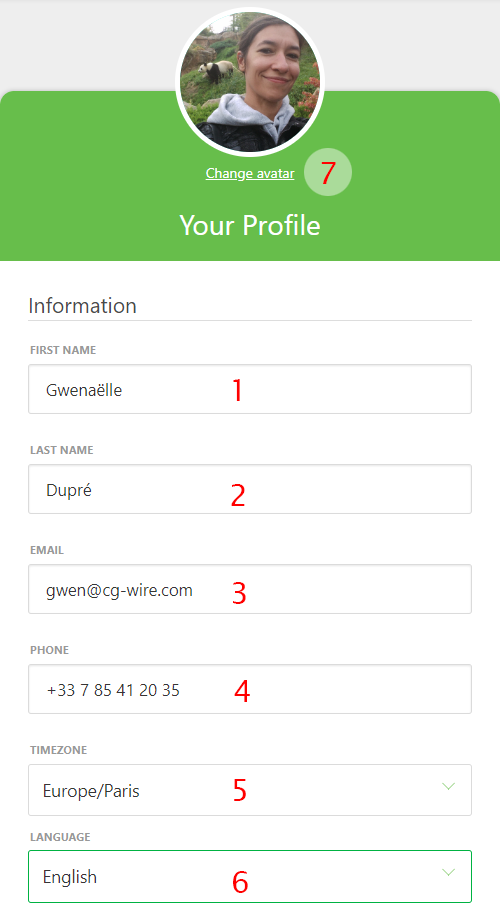
On this new page, you can check your name (1) (2), your email (3), fill in your phone number (4), change the timezone (5), the language of the website (6), and post a pic of yourself as your avatar (7). It helps to recognize who is doing what!
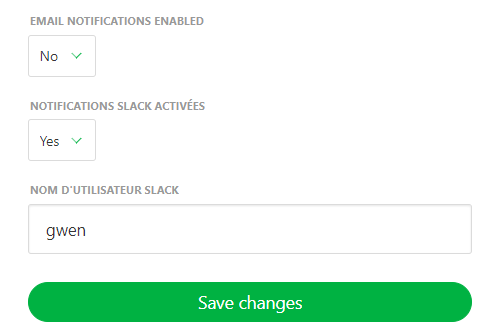
You can also define what kind of notification you want: email or Slack.
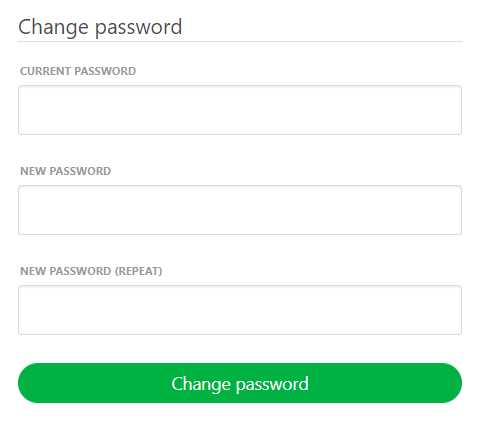
If you keep scrolling, you can also change your password if you want. We encourage you to change the default password with one of your own.
Initial Setup and Profile Customization
Start by setting up your profile to update your personal details and customize Kitsu’s interface. This will help your team recognize you and allow you to tailor notifications and settings to fit your workflow.
Access Your Profile: Click your avatar at the top right of the screen, then select Profile.
Customize Your Experience:
- Update your name, email, phone number, timezone, and website language.
- Upload an avatar photo to help others recognize you.
- Choose notification preferences (email or Slack).
- Customize the Theme color and toggle the Support Chat visibility.
Pro Tip
This section also provides quick links to Documentation, Tutorials, our Discord community, YouTube channel, and our public Roadmap, ensuring you have access to helpful resources at any time.
For security purposes, it’s highly recommended to replace the default password with a strong and unique one.
2. Managing Your Assignments"
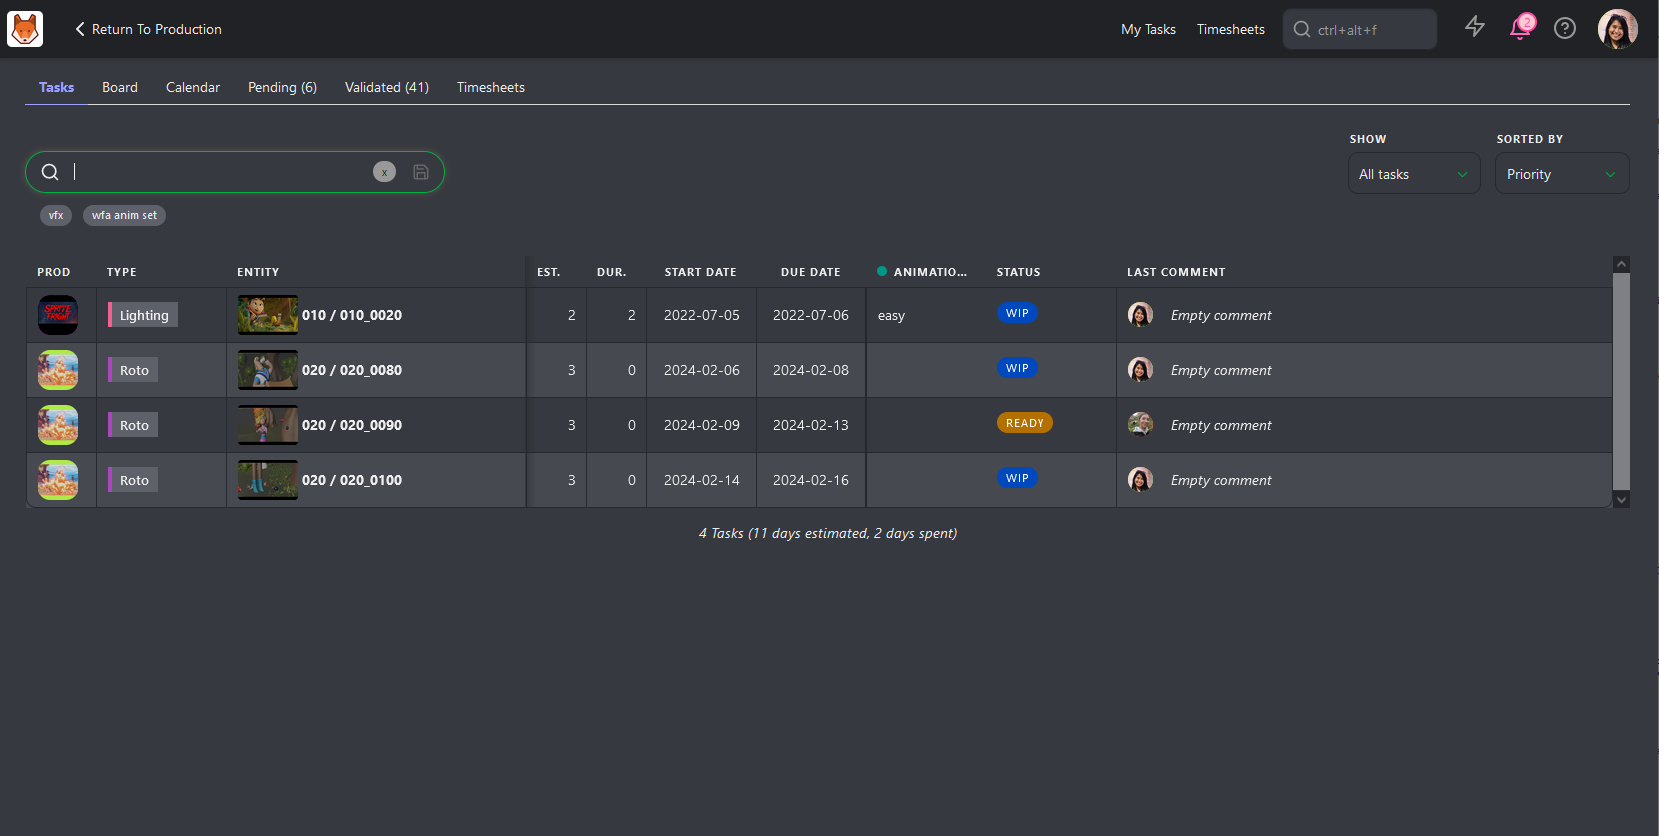
Your My Tasks page is your main hub for assignments and opens automatically upon login. Here you can see a list of tasks you are assigned along with some key information.
Key Information Available:
- Production: The project your task is associated with.
- Entity: The specific asset or shot assigned to you.
- Estimates & Duration: Time-related information for your tasks.
- Due Date: The deadline for completing your task.
- Status and Priority: Key details to understand task urgency.
Additional Features:
- Under the Show dropdown, you can choose to display All Tasks or focus on those Due This Week.
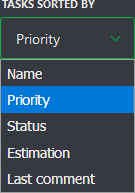
- Under the Sorted By dropdown, you can sort tasks by Name, Priority, Status, Estimation, or Last Comment.
- Use these filters to narrow down your list of tasks, or use the search box to find a specific task.
You can access My Tasks via:
- The shortcut at the top of the screen.
- The User section of the main menu under MY TASKS.
- Clicking the Kitsu logo.

View Your Assignments (Board View)
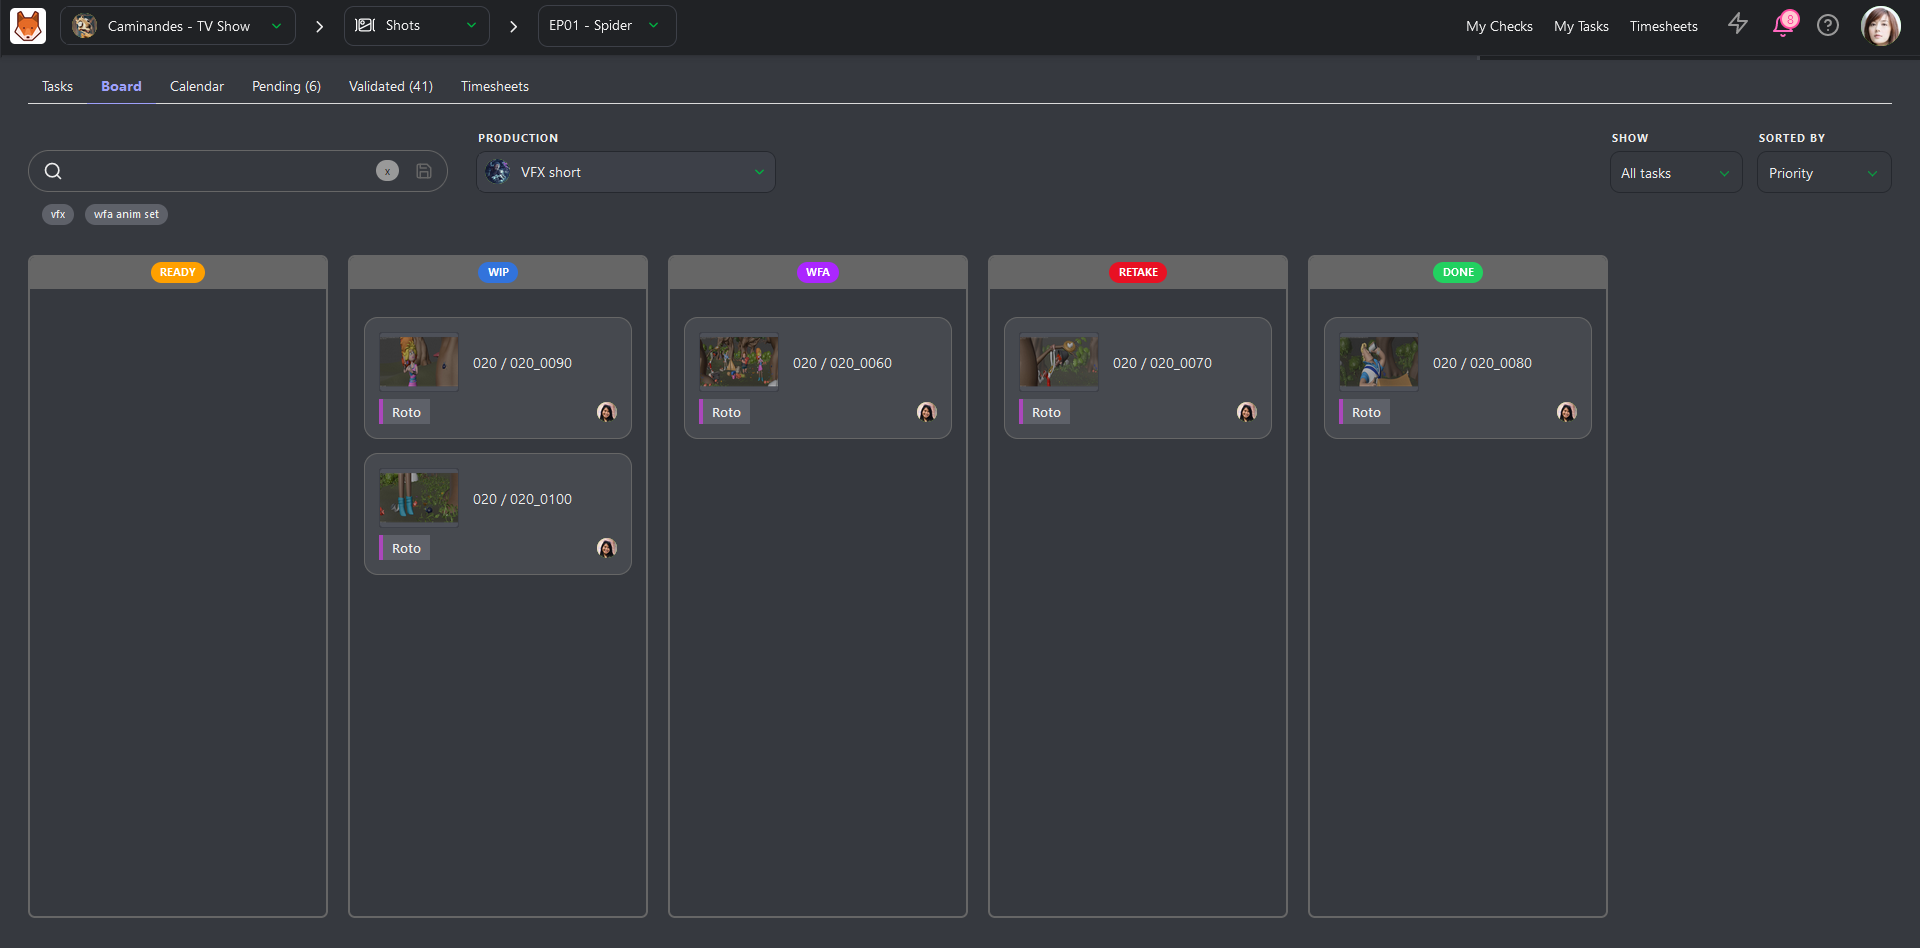
The Board Tab displays tasks organized in columns based on their status. Each task card includes:
- A Thumbnail
- Task type name
- Entity name
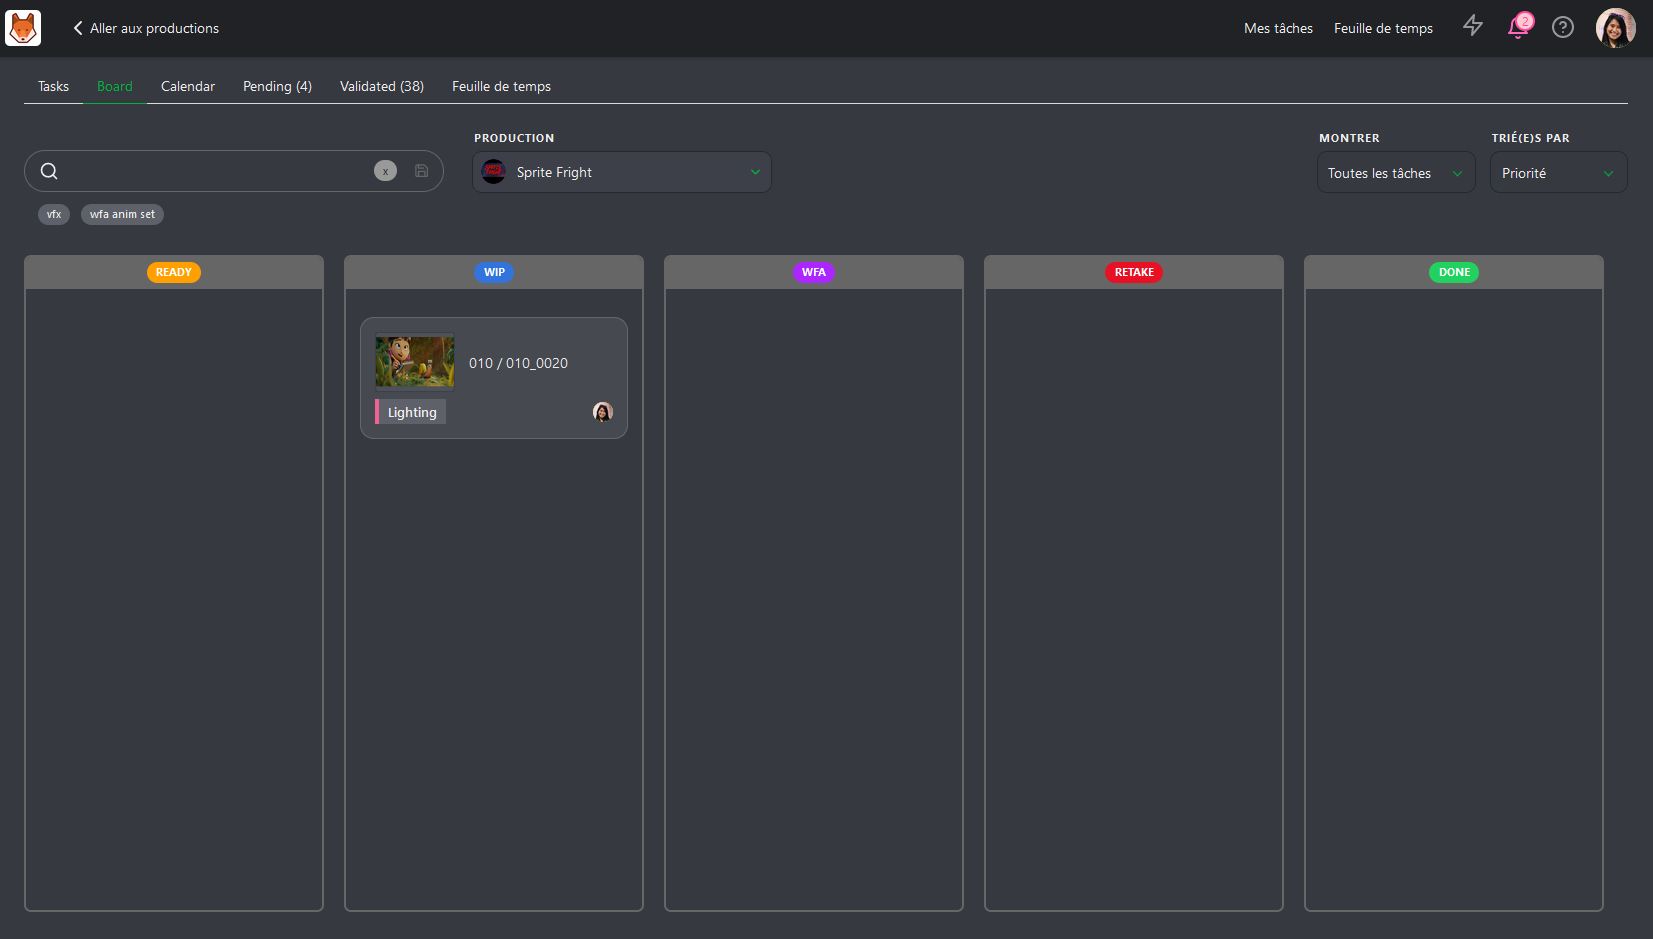
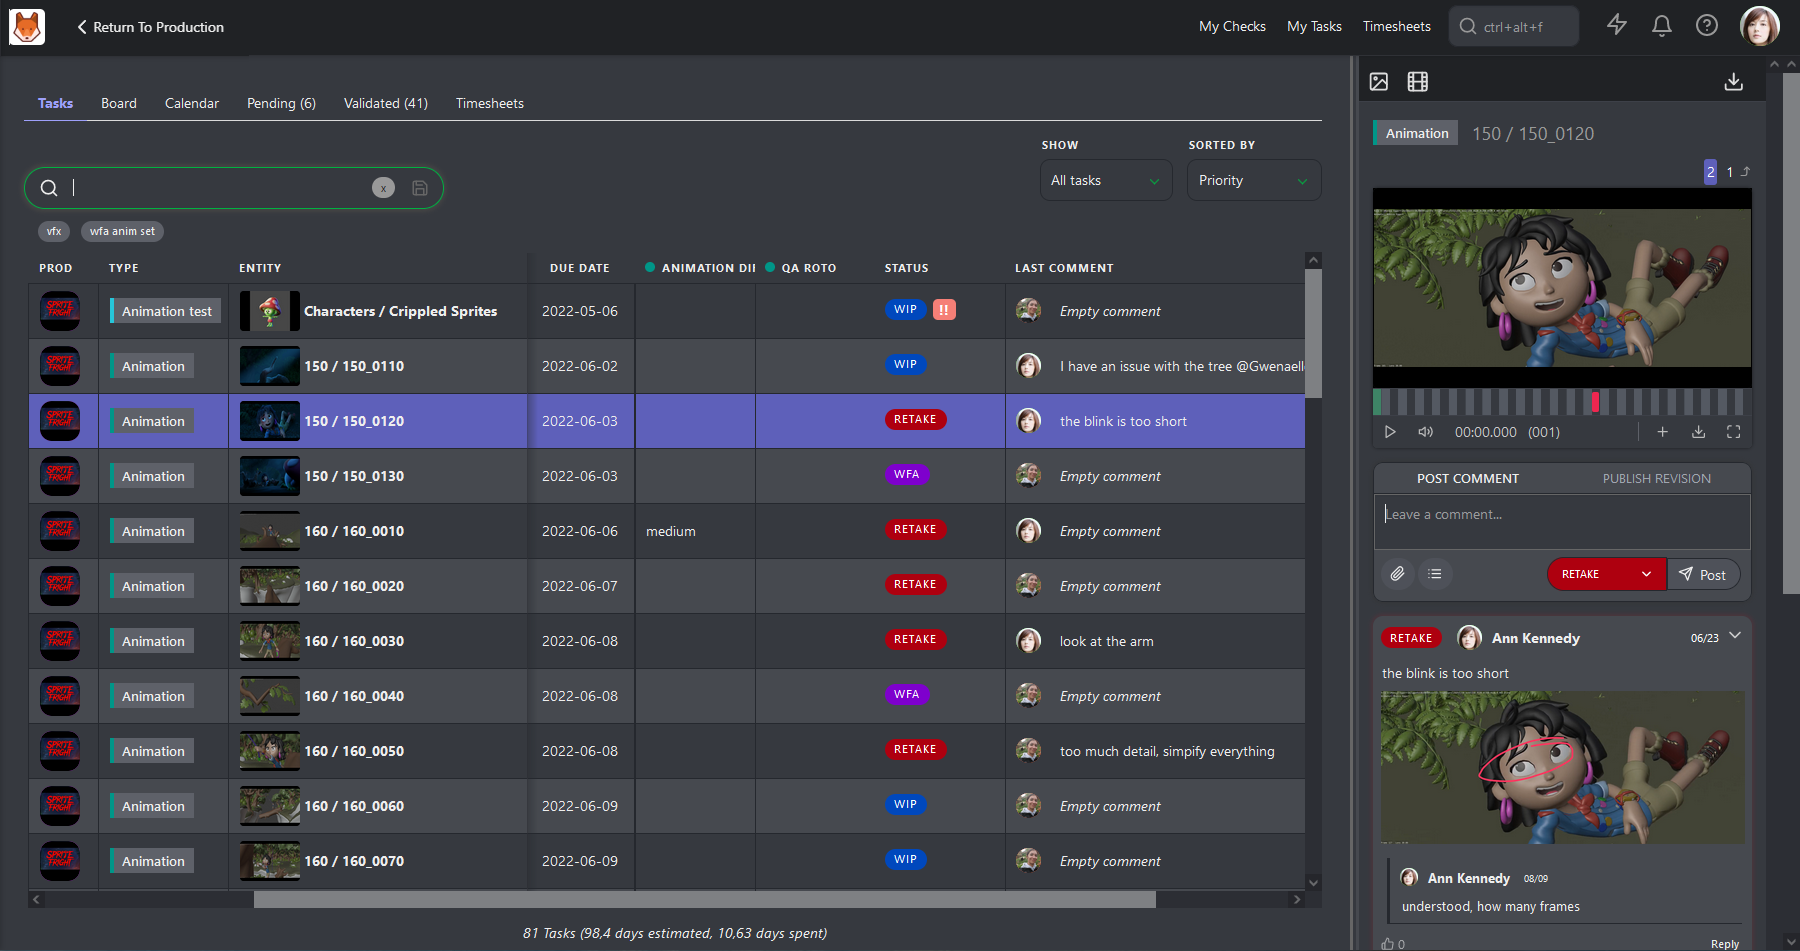
- Clicking a card opens a panel on the right to view or add comments.
- To update a task’s status, drag it to the desired column.
View Your Assignments (Calendar View)
The Calendar View displays tasks according to their Start and Due Dates. Tasks spanning multiple days are visually extended across the calendar.
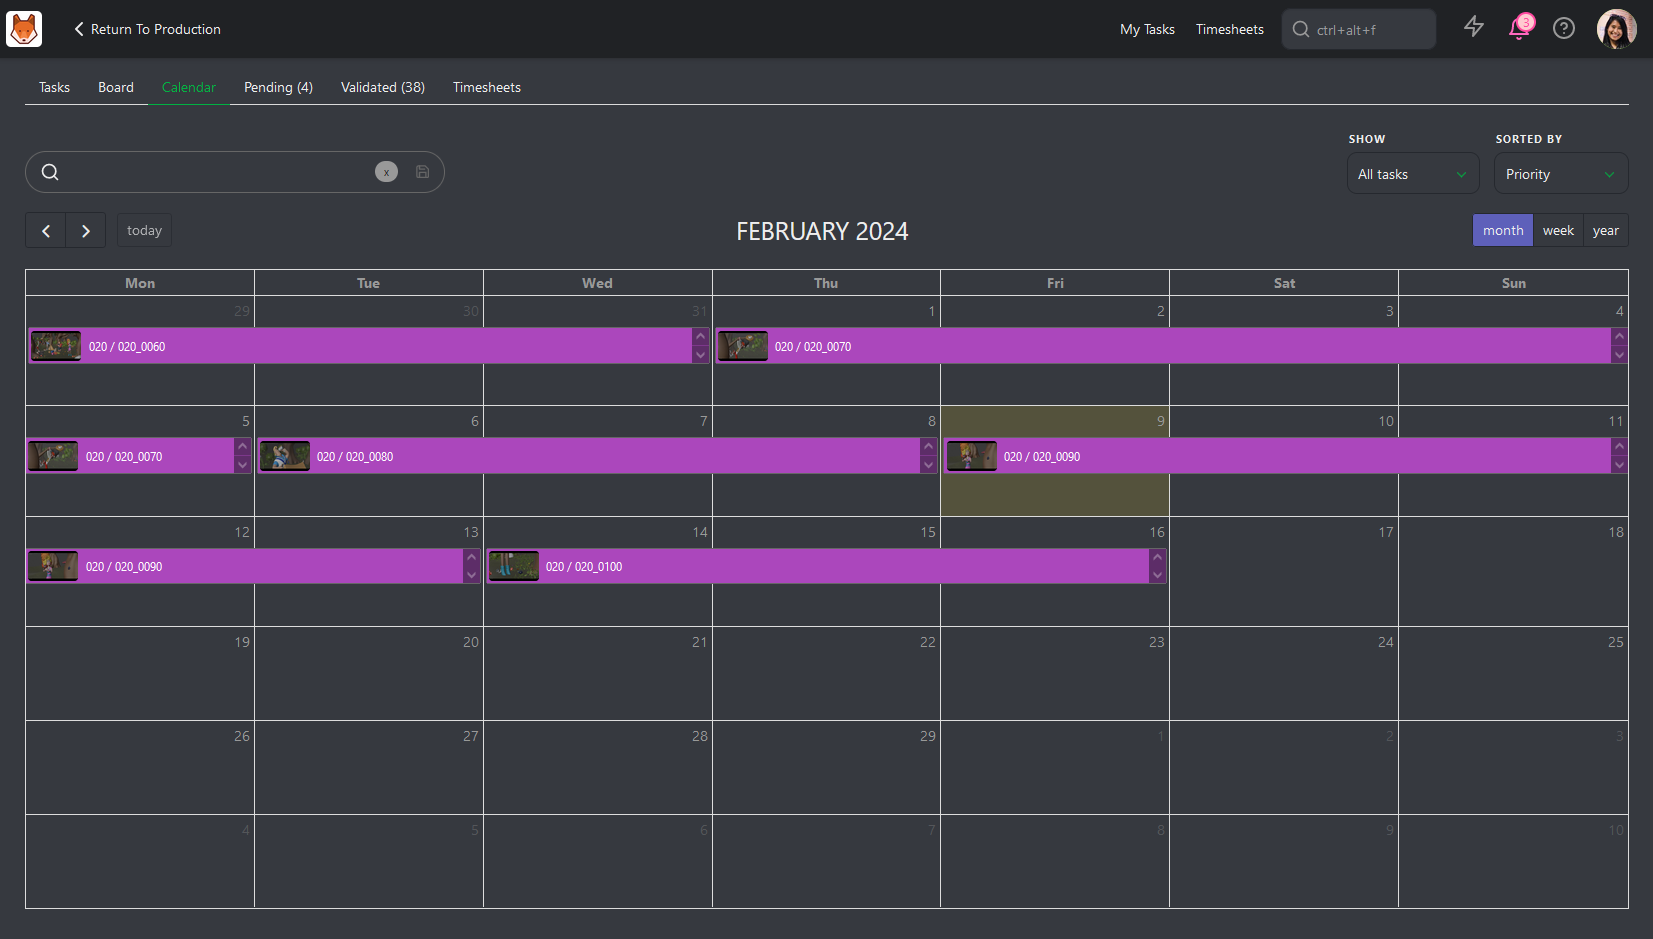
- Clicking a task opens the right-side panel for updates and comments.
- Like other views, you can sort and filter tasks here.
Check Your Tasks
A supervisor will typically have tasks assigned to them in addition to supervising your department. This means you need to split your time between completing your work and managing your team. Here's how to effectively manage what tasks you need to do.
When you log into Kitsu, you'll notice the My Tasks button at the top of the screen. This provides direct access to your to-do list. By default, the list is sorted by priority, so the task at the top are the ones recommended address first.
On the My Tasks page, you can filter the task list by Production, Task Type, Status, and other criteria.
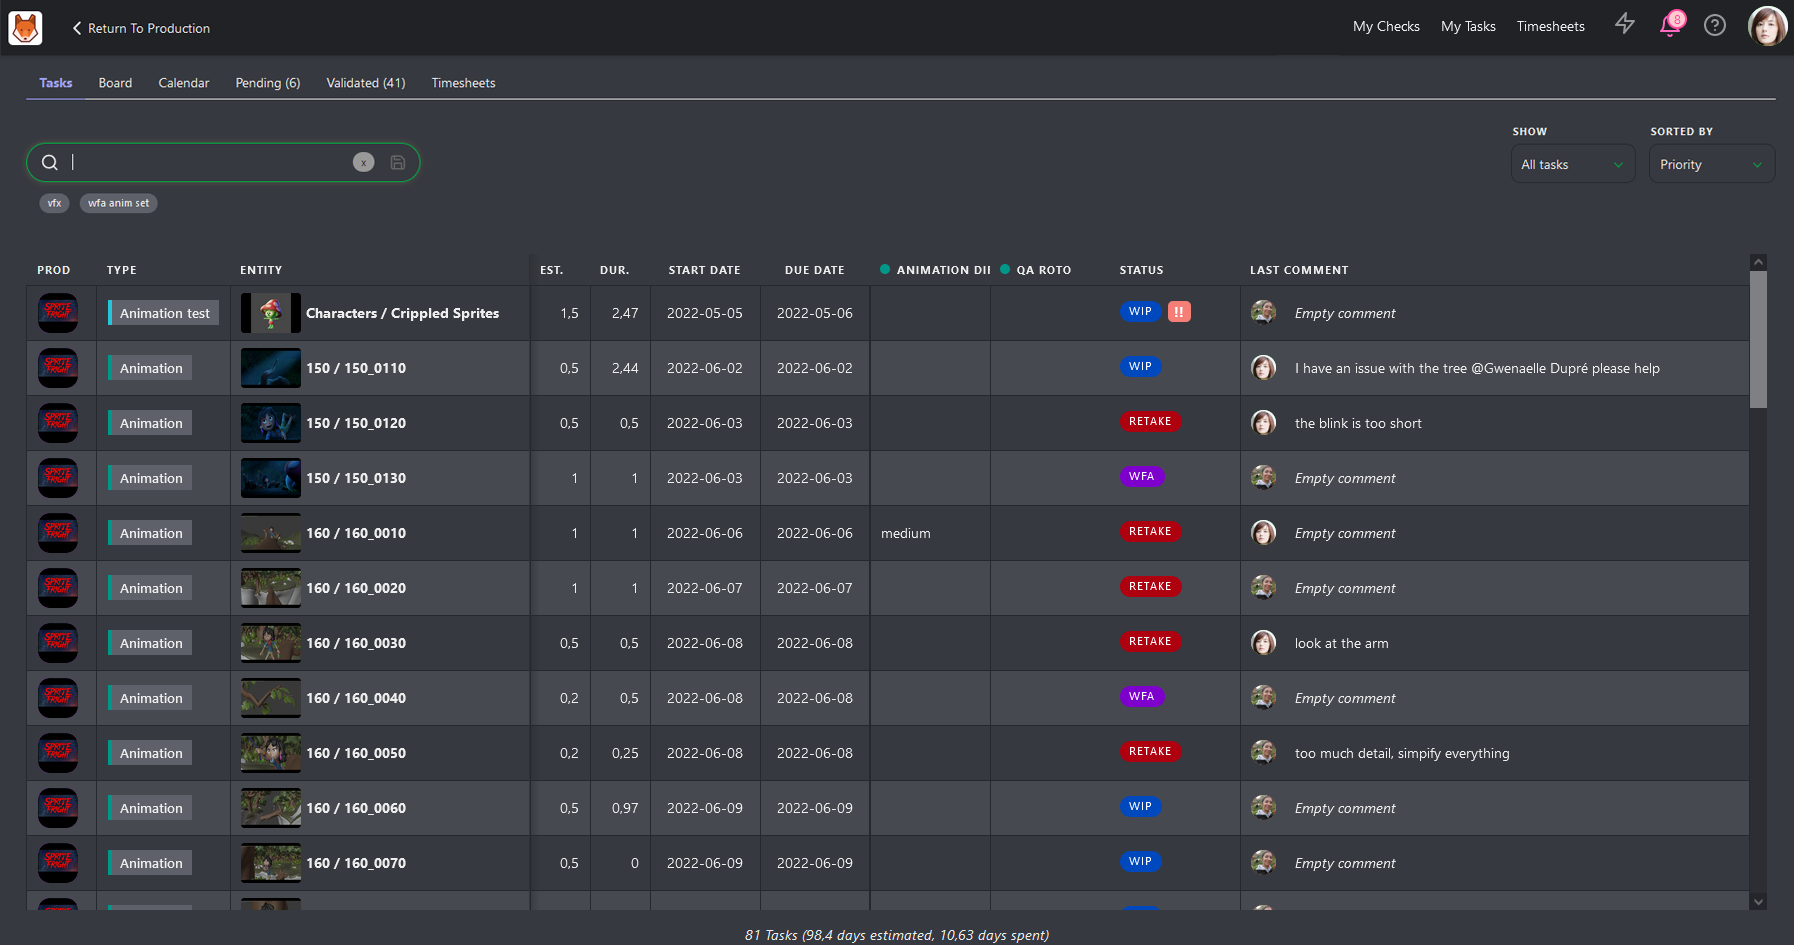
To view more details about a task, click on its Status to open the comment panel. Here, you can comment on the task and publish a new revision if needed.
You can also use the Board to quickly update the status of multiple tasks by dragging and dropping into each status column.
Daily Supervision Tasks
Once the assignments and estimates are done, you can focus on the day-to-day operations. To easily see an overview of tasks from your department, you can click on your task type name from any page.
Once on the detail page, your first action is to click on the Display tasks as a contact sheet  button.
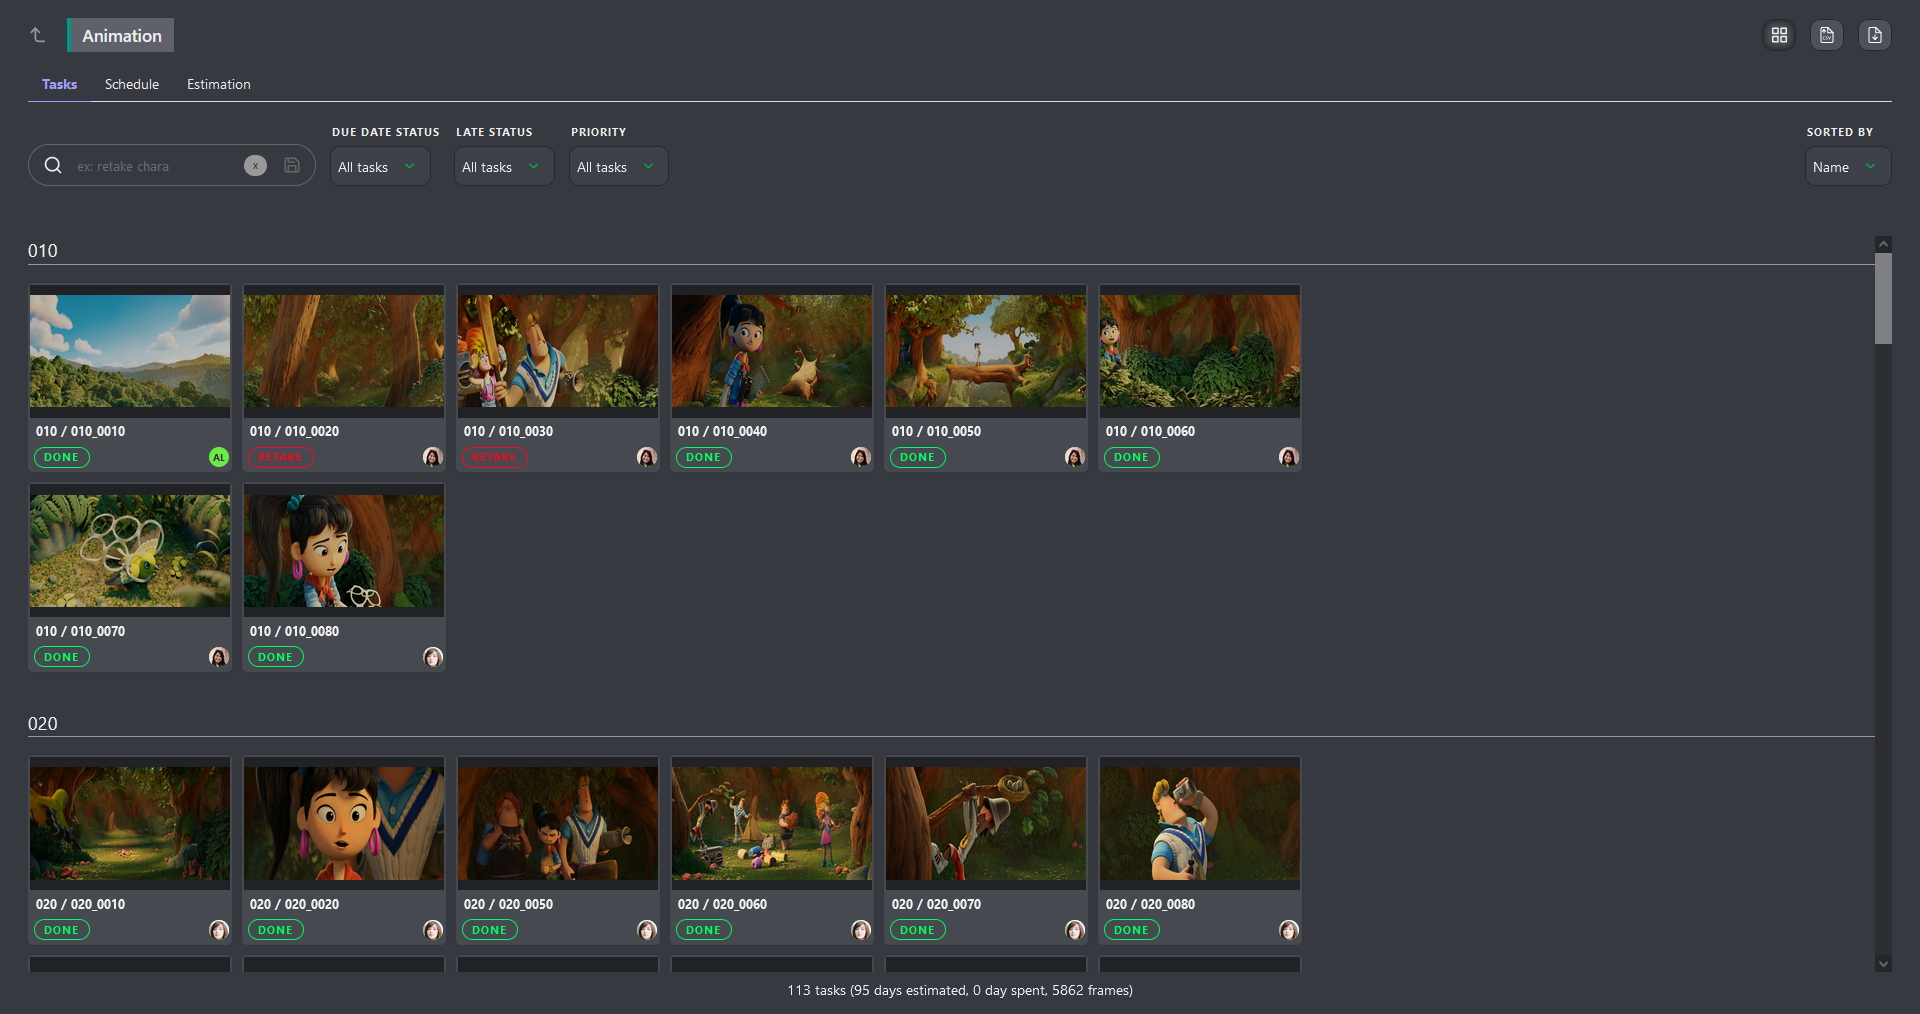
Now, you can easily hone in on tasks that require your attention using the built-in filters. For example, say you want to see only the tasks that are yet not complete yet. In this case, you can filter our tasks with the -done status, along with adding a Due Date Status filter, to show tasks that are Due This Week.
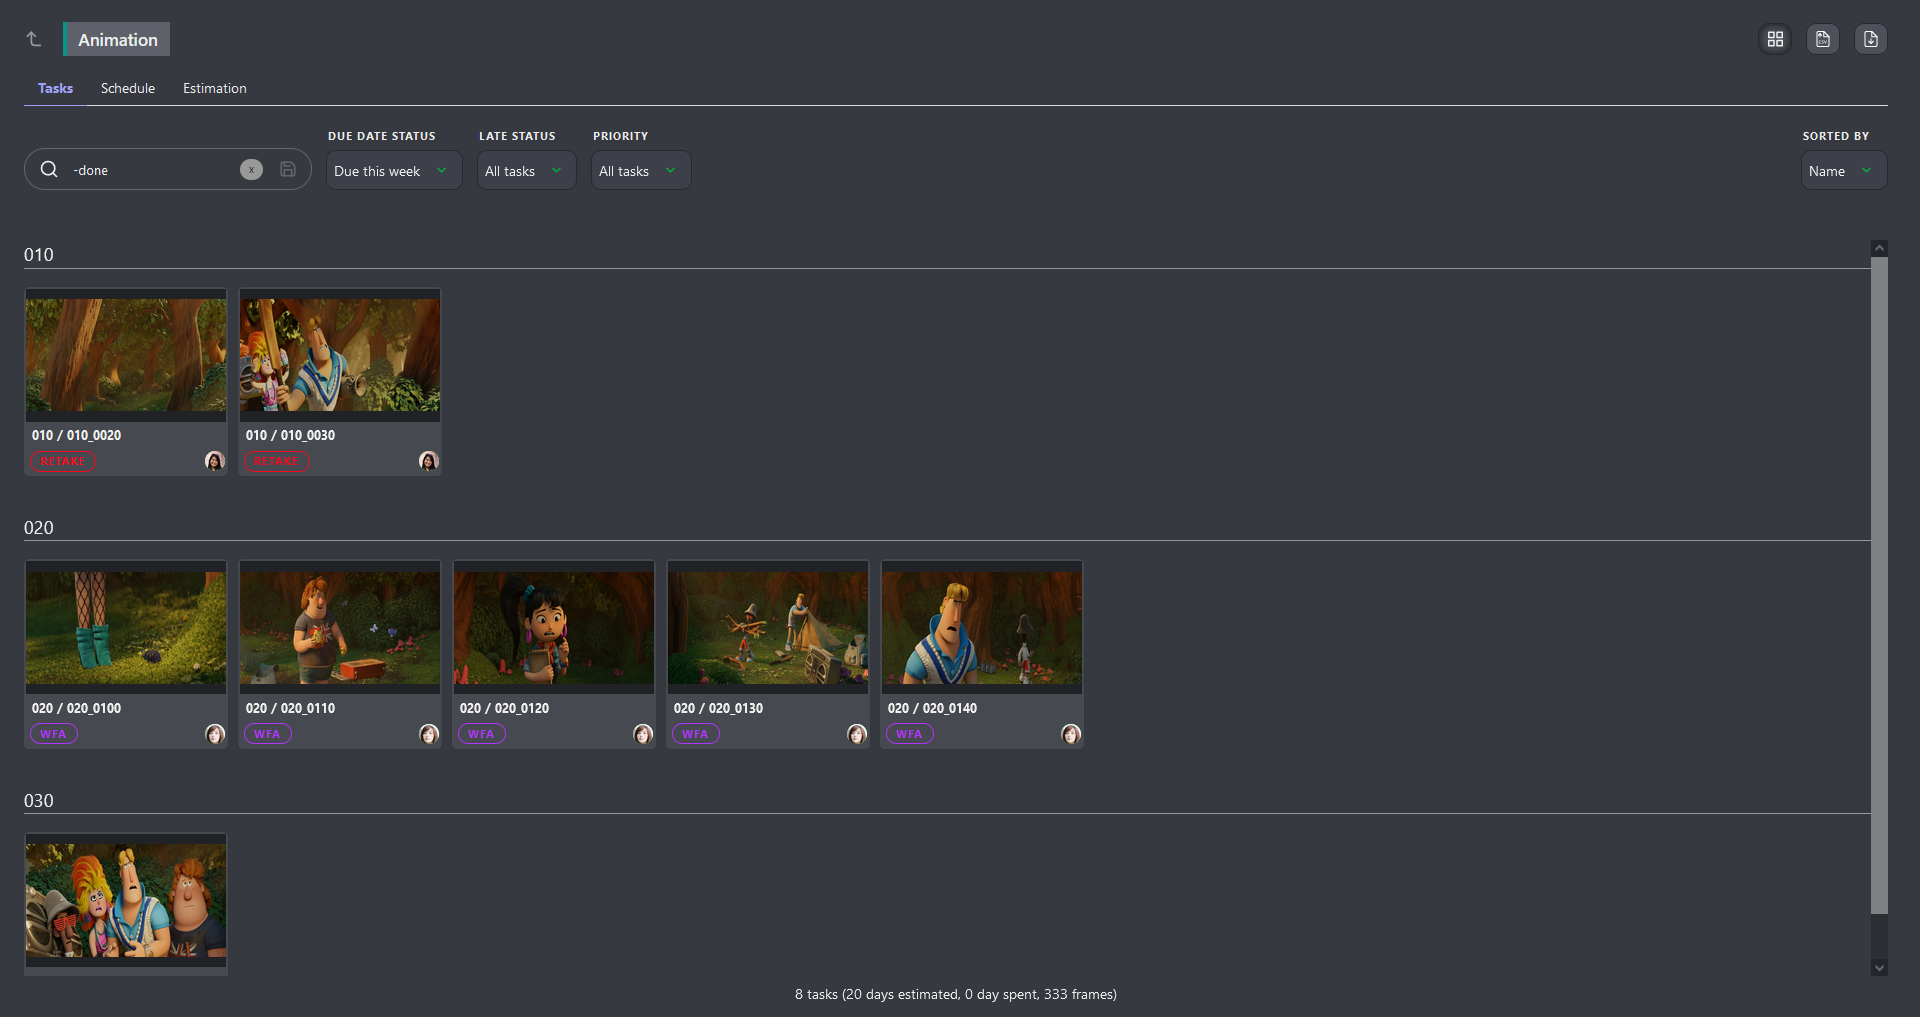
You can easily enable / disable filters to quickly hone in on the right information.
TIP
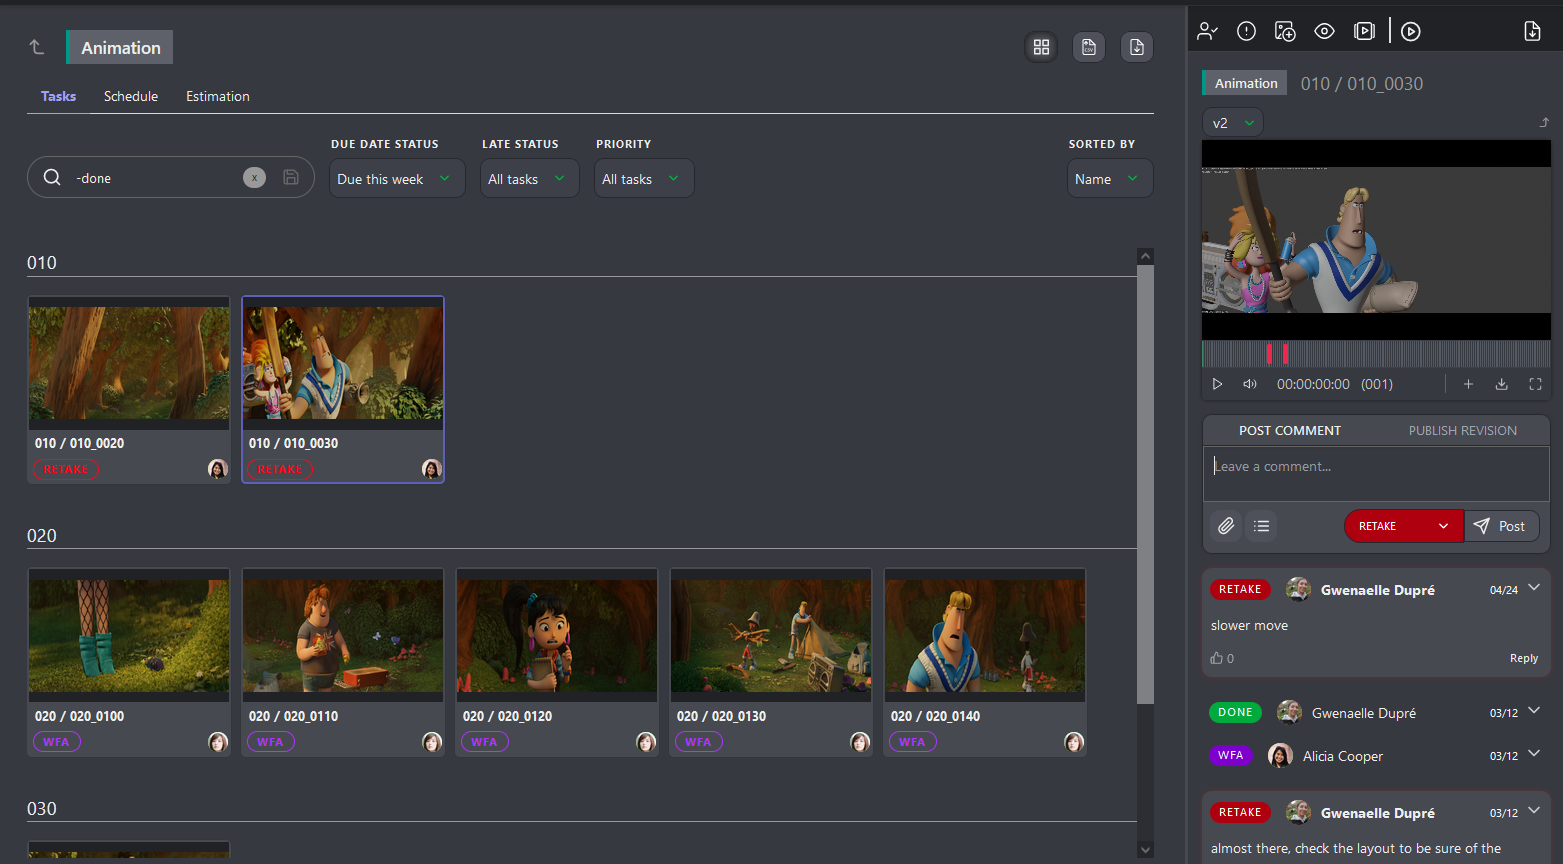
If you need more information about a task, click on it's name to open the comment panel on the right.
3. Updating Task Progress"
Once you've made progress on your task, you'll want to update your team on its status.
Updating Task Statuses
- Click the task’s Status icon on the My Tasks page or the relevant asset page.
- Add comments to provide updates or ask questions.
- Change the status (e.g., from "Ready" to "WIP").
- Click Post to save changes.
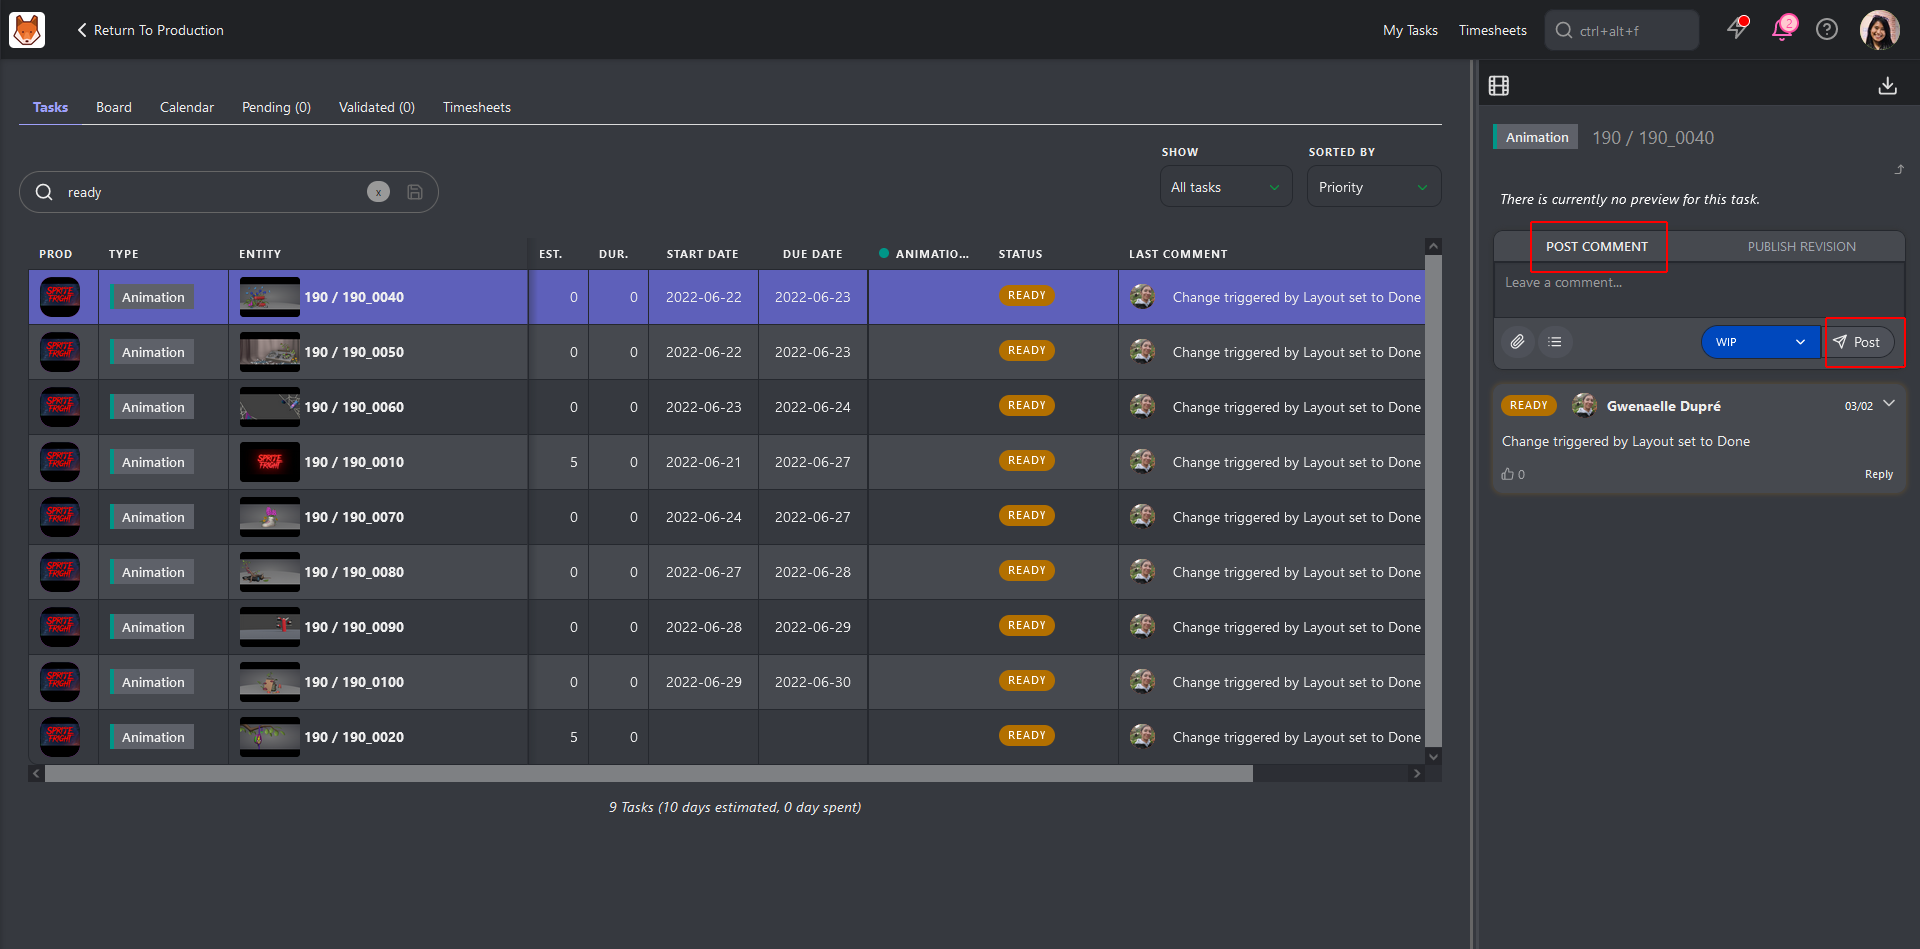
You can edit your most recent comment by clicking the History button and selecting Edit. 
Statuses and Feedback
In Kitsu, statuses serve as indicators reflecting the current state or progress of a task. You can easily see the current status at a glance and add comments to update team members when a status changes.
The Comment Panel
To change the status of a task and write a comment, click on the status of the task.
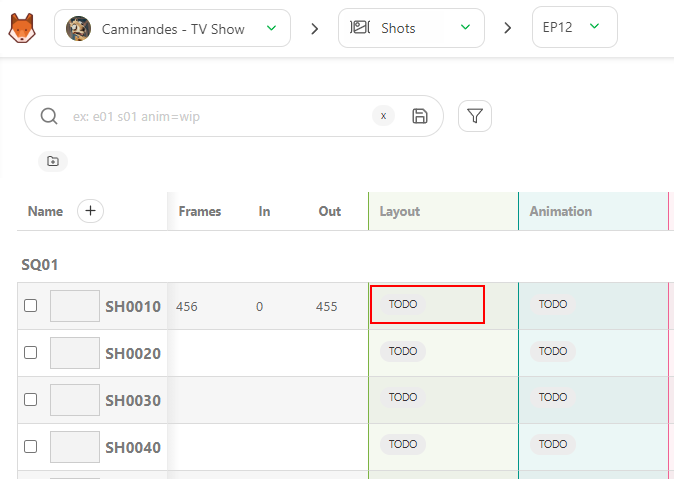
A panel will appear on the right where you can write a comment, change the status, and attach a file.
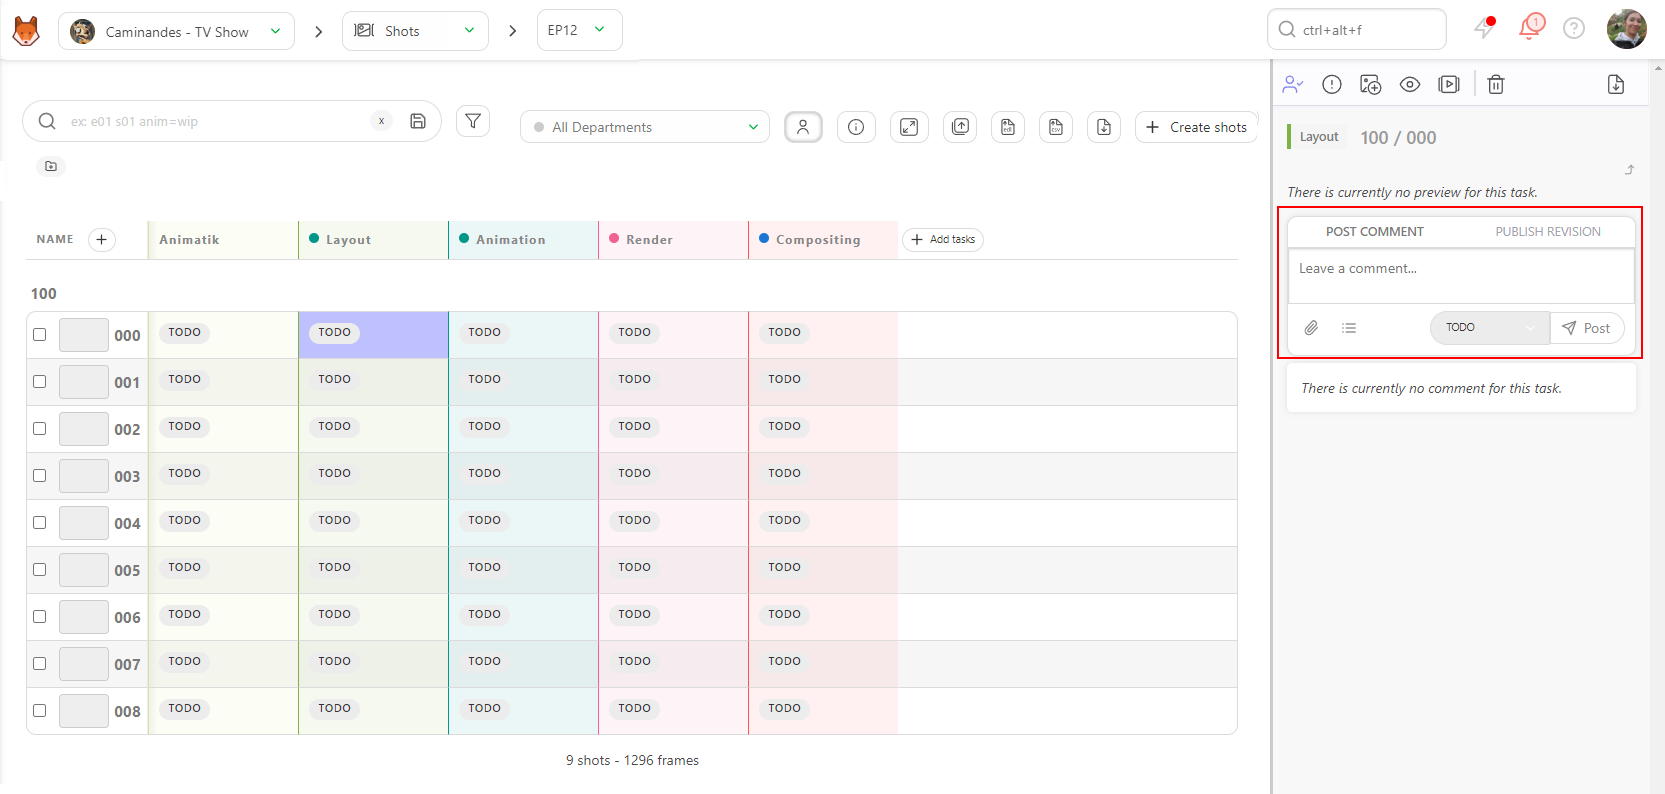
The Comment Panel is split into two tabs:
- POST COMMENT
- PUBLISH REVISION
You can change the Status, from the POST COMMENT tab.
Comments support the use of Markdown, which is a markup language used for formatting plain text in a simple, readable way. It allows users to add basic formatting elements such as headings, lists, bold and italic text, links and much more. For specific syntax, you can refer to the markdown guide website: Markdown Guide.
Tagging Team Members
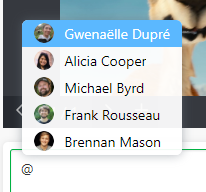
You can also tag a team member in the comments to notify them directly. To do this, type @, which will open a submenu with a list of team members. Select the person you wish to notify, and upon submitting your comment, they will receive a notification.
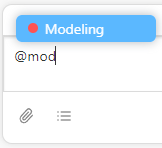
You can also tag an entire department by typing '@' followed by the department's name.
Adding Checklists
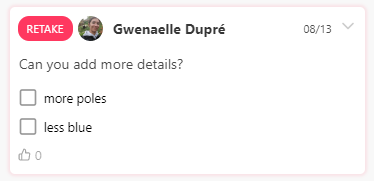
You can also add checklist items to keep track of miscellaneous items that don't warrant their own task. To add a checklist to your comments, click the Add checklist button. The first item of the checklist will appear.
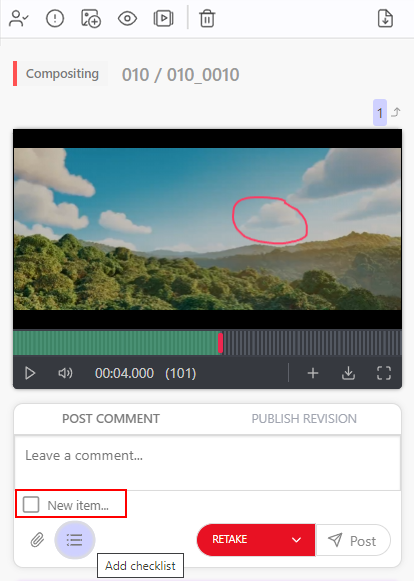
Hit Enter or click the button again to add more checklist items, and give each one a name.
Adding Attachments
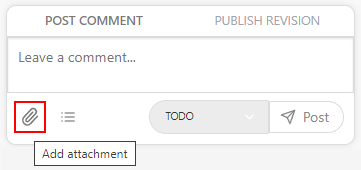
To attach a file as a picture, click on the Add attachment button.
Select a file from your hard drive or paste a screenshot.
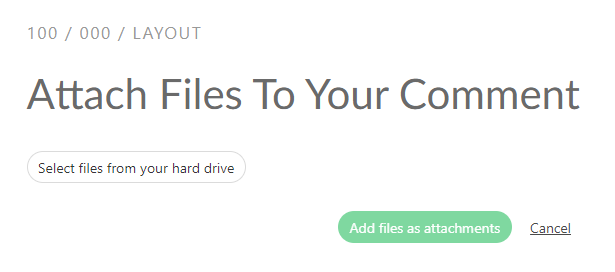
Validate the attachment by clicking on Add file as attachment.
Next, select the Status you wish to change the task to from the dropdown menu.
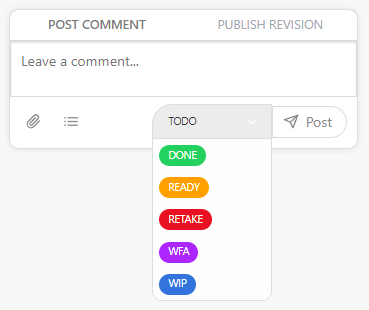
Finally, click the Post button to submit your comment and status update.
Changing Statuses In Bulk
Updating Multiple Statuses at Once
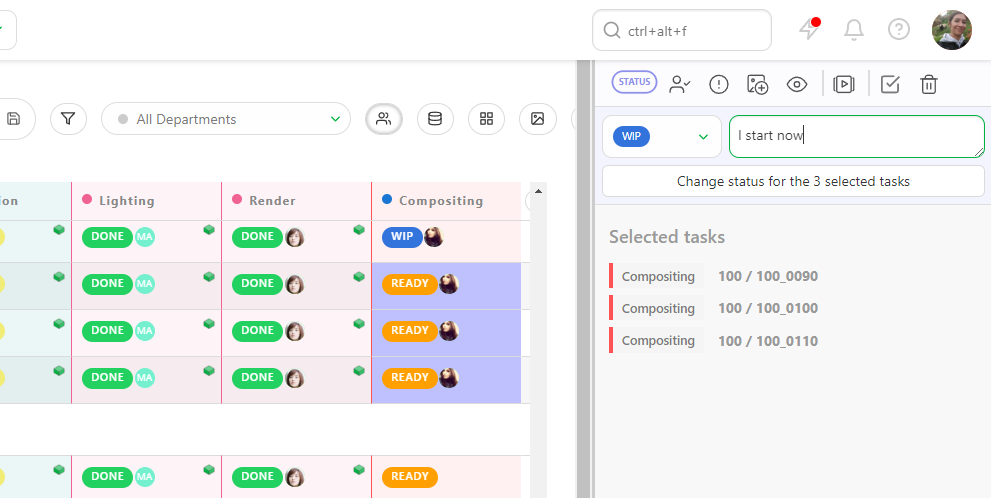
You can also change the status for multiple tasks at once.
Select multiple shots or assets by pressing Ctrl / Cmd or Shift and select the tasks you wish to include.
Then, go to the action menu's Change status section.
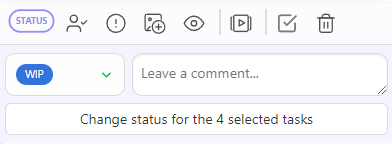
Choose the new status for your selected tasks (1). You can also add a comment for all the selected tasks (2). Save the new status with the Confirm button.
Artist Board Statuses
Customizing Statuses Used on the Artist Board Page
When you assign a task to an artist, it will appear on their to-do page when they log in.
While the default view shows their tasks in a traditional list view, they can also choose to display their tasks in a board view. Each Status will be be represented by a column, and the assigned tasks will be cards that can be dragged from status to status as the tasks progress.
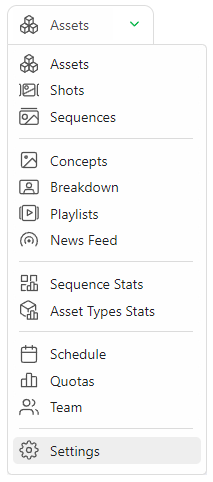
To customize the board view, go to the settings page of your production.
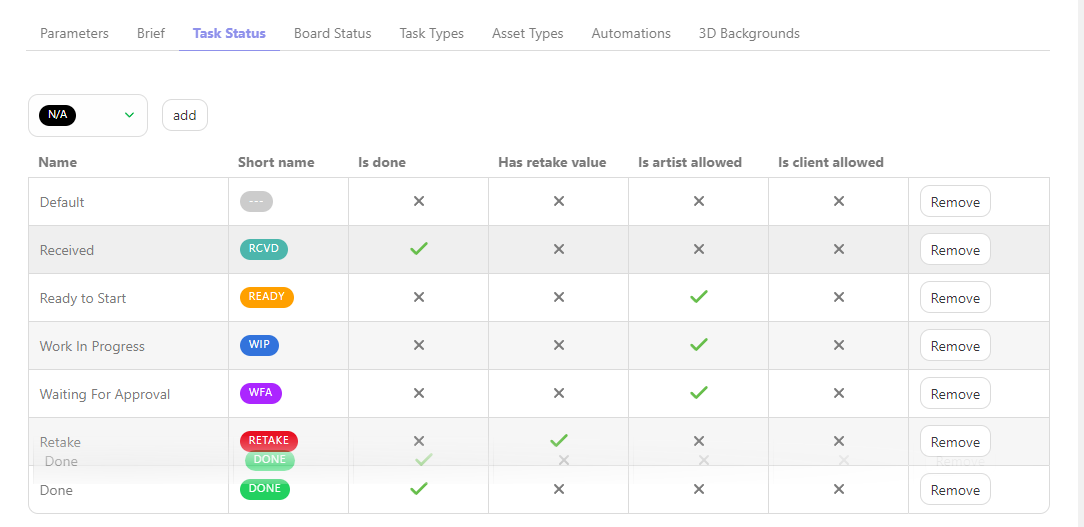
Then go to the Task Status tab. You will see a list of the statuses used in your production.
These statuses will be used as the columns on the board page. You can drag and move the statuses to change their order as they appear in the board view.
Next, click on the Board Status section.
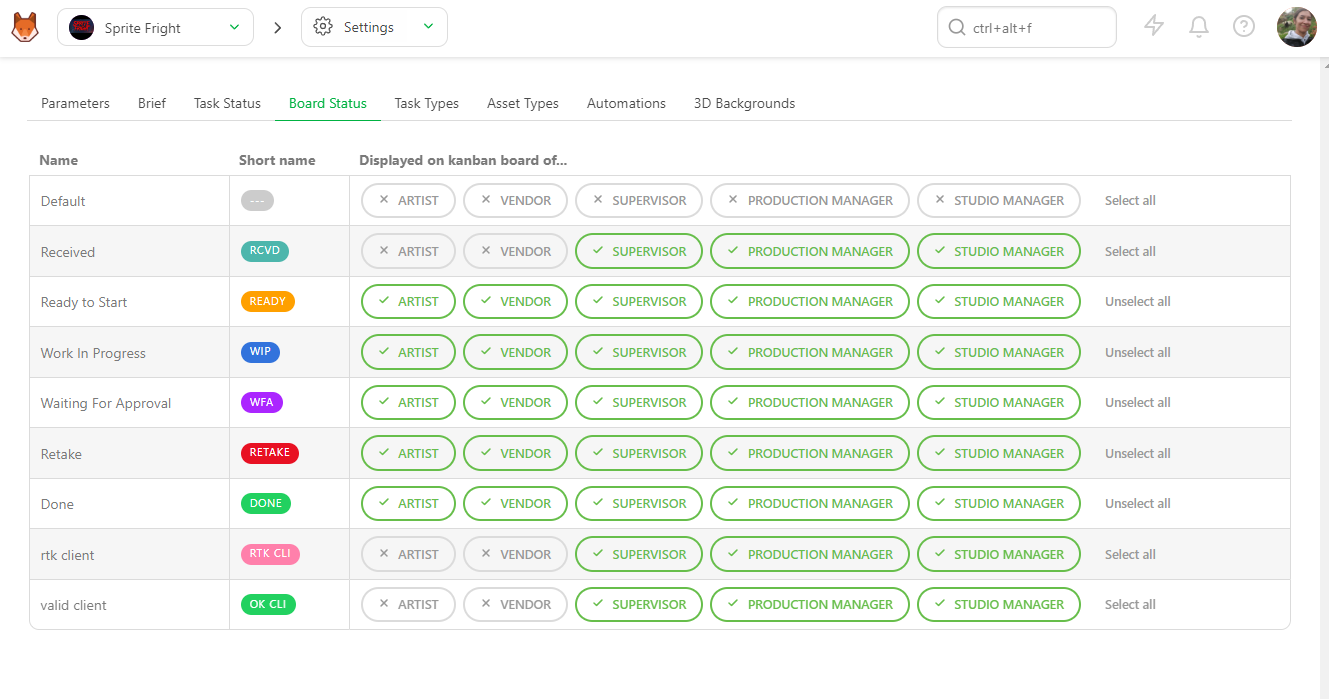
Here you can customize which permission roles can see what statuses on their Board page.
To access this view, select the Board tab from the My Tasks page. Your team will see a page that looks similar to this
TIP
Customizing which statuses appear in the Board view is set per permission role. It cannot be customized on an individual user basis.
4. Publish a Concept"
To publish a Concept, navigate to the Concepts page from the project navigation menu.
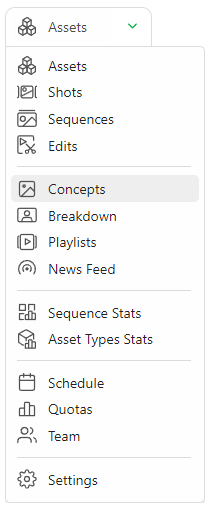
To upload a concept, click the Add a new reference to concepts button. You can upload one or several concepts simultaneously.
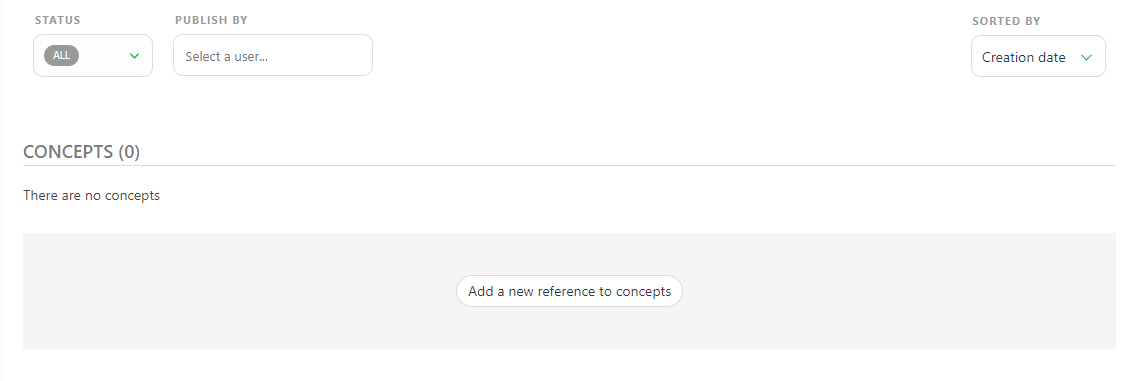
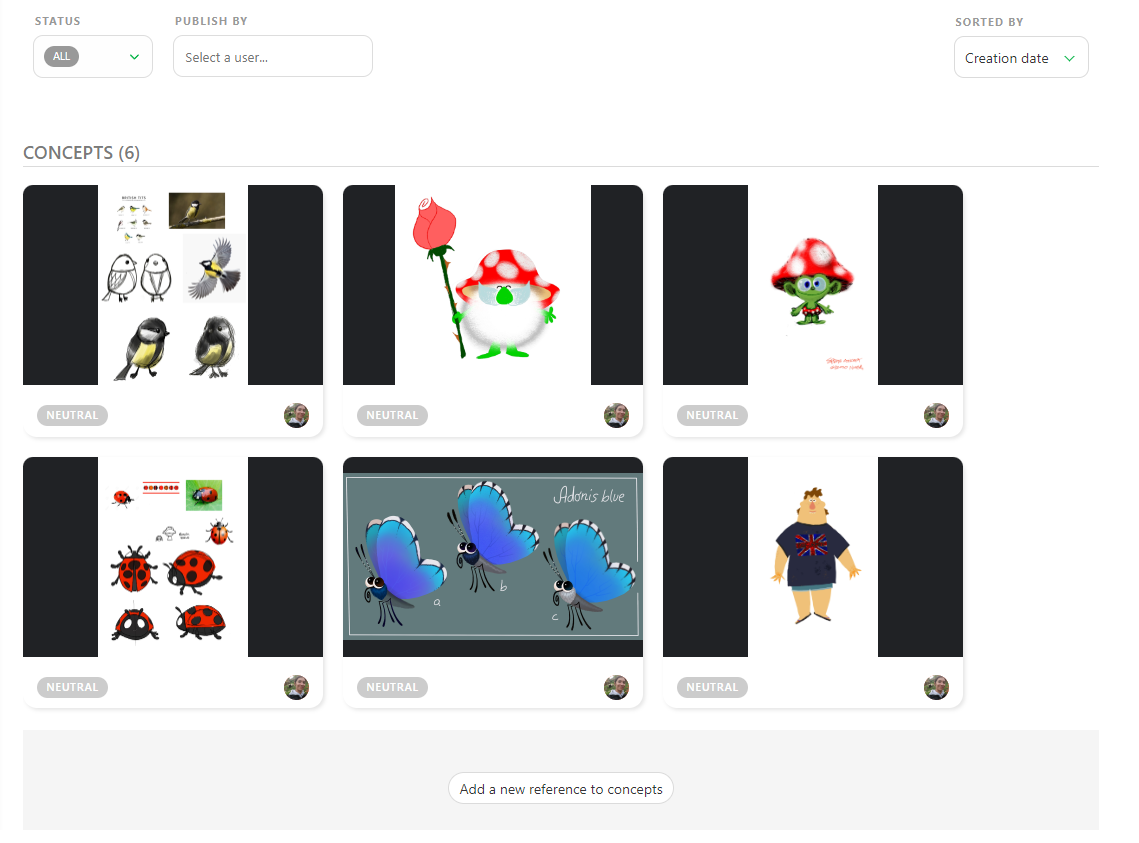
After the upload is complete, previews will be generated and visible from your concepts page.
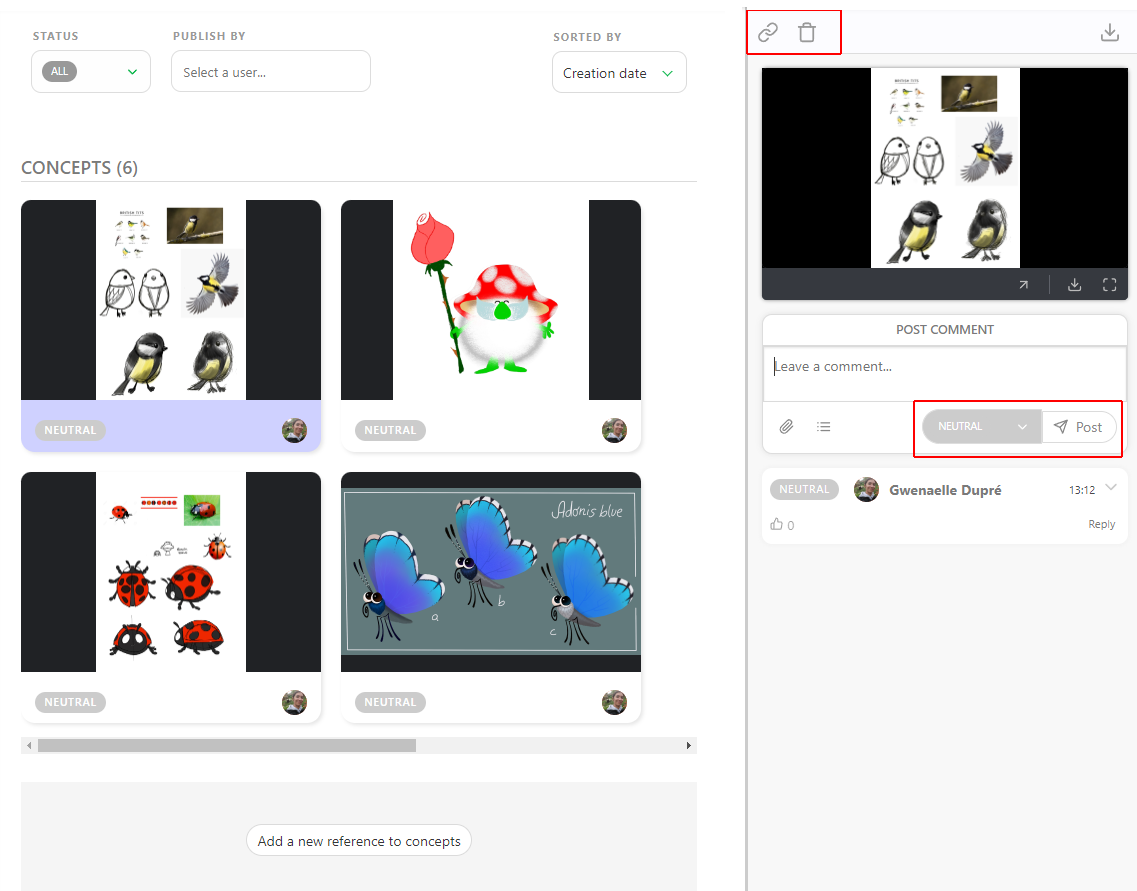
Click on the thumbnail to see an enlarged preview of your concept, or click on the status to open the Comment Panel on the right.
With the comment panel open, you have two options:
- You can link a concept with an existing asset / delete and existing link.
- You can comment and change the status of the concept.
It is good practice to only have one version per Concept. If the concept is not approved and requires additional changes, then it's better to version-up that concept.
5. Request a Review"
Once your task has been completed, you can submit it for review. To do this:
- Change the task status to Waiting for Approval (WFA).
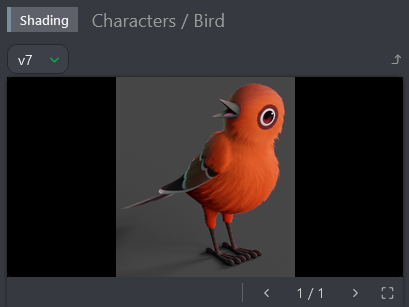
- Attach a preview file by dragging it into the upload area or clicking Attach Preview.
- Click Post to finalize your submission.
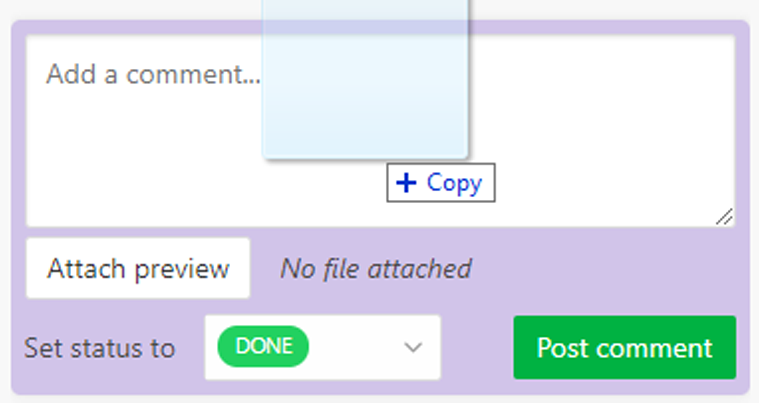
Previous revisions are saved and remain accessible for reference.
6. Complete Your Timesheet"
WARNING
All of the previous chapters are based on the fact that Estimation and Duration are filled for each task.
Everybody has to do their part. You and the supervisor will handle the estimation, while your team will fill out their timesheets.
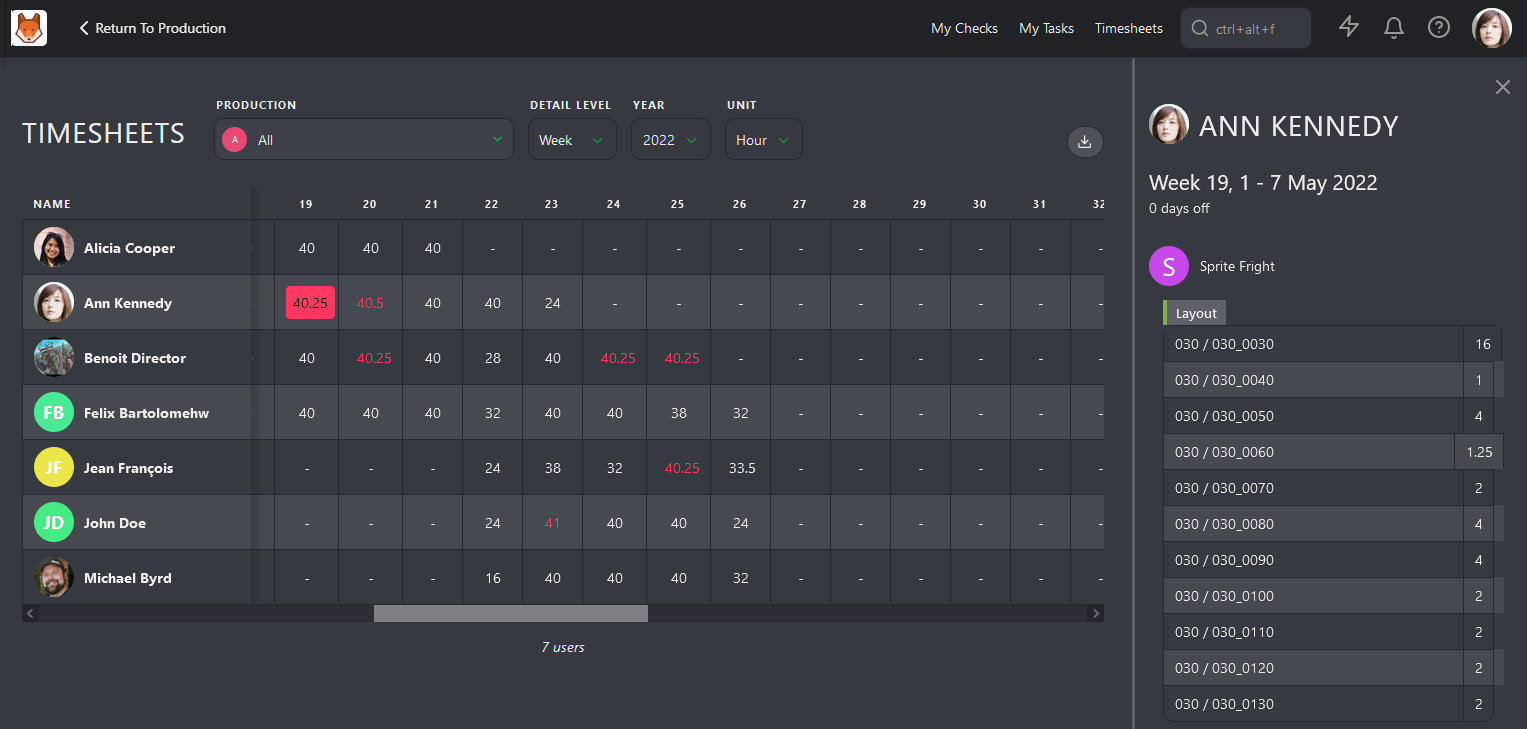
Navigate to the main menu and select the Timesheet page.
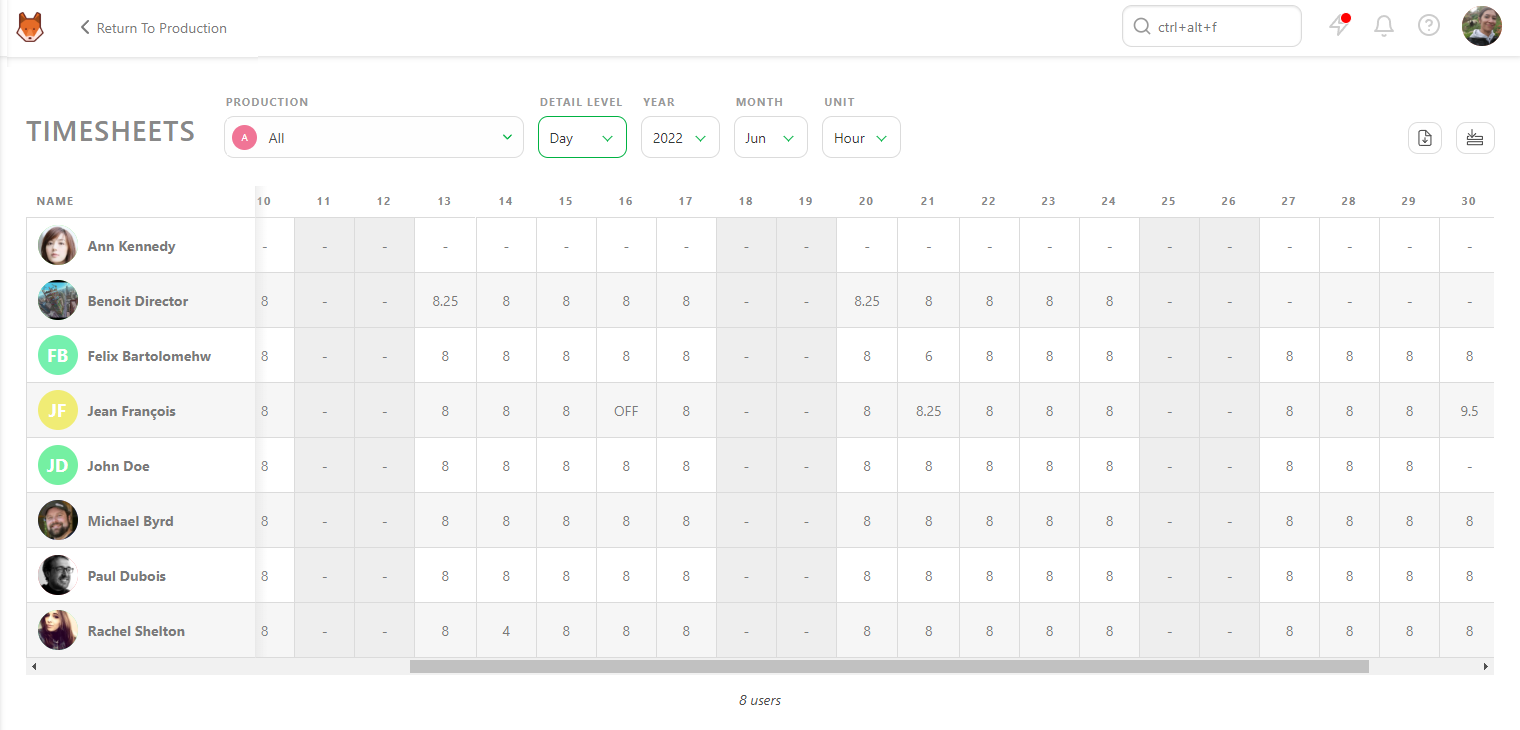
Viewing Timesheets
On this page, you can view each team member's timesheet by day. This allows you to check whether they fill it out daily, took a day off, or worked extra hours.
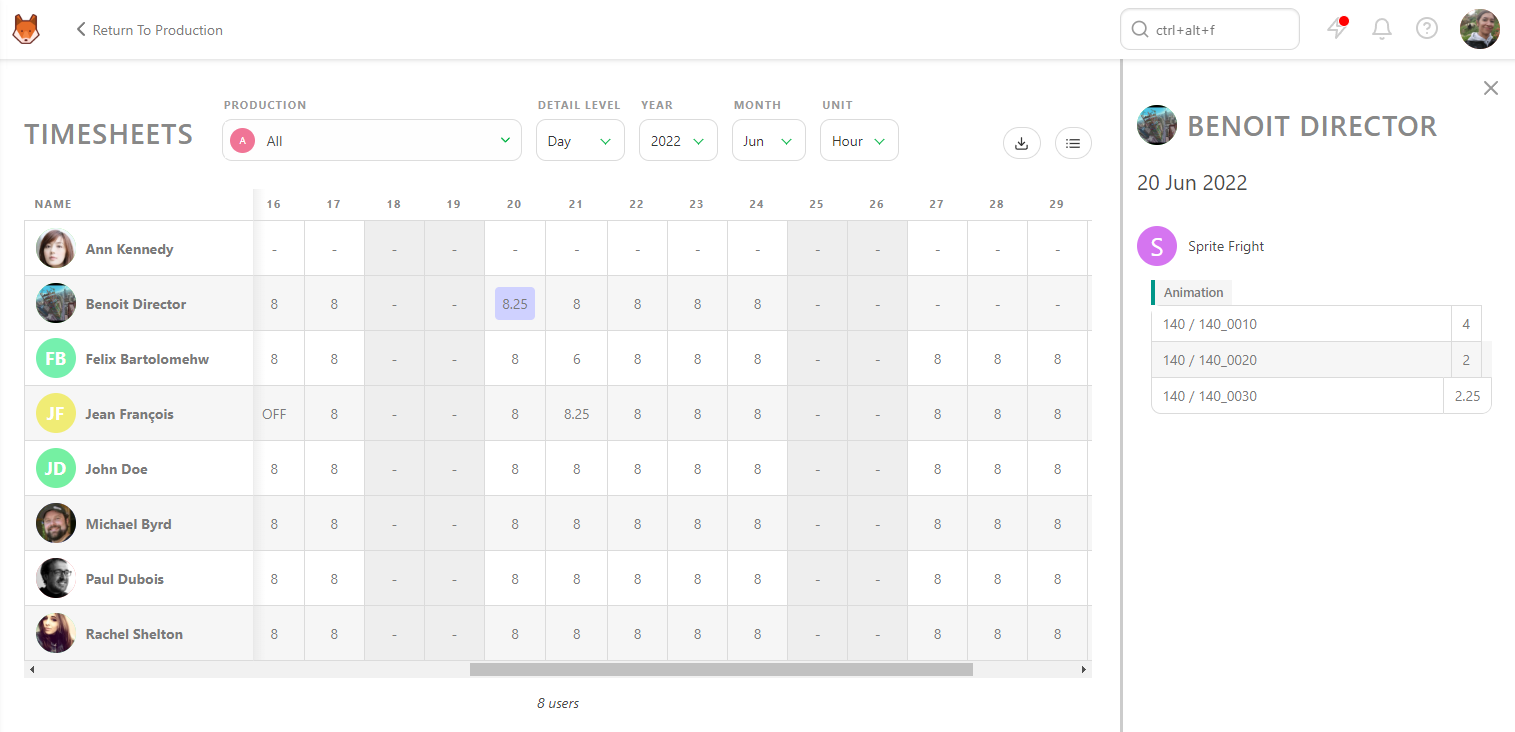
If you have a question about a timesheet entry, click on it to see the details of the production, task type, and specific task.
Once everything looks good at the day level, you can change the Detail Level from Day to Week, Month, or Year.
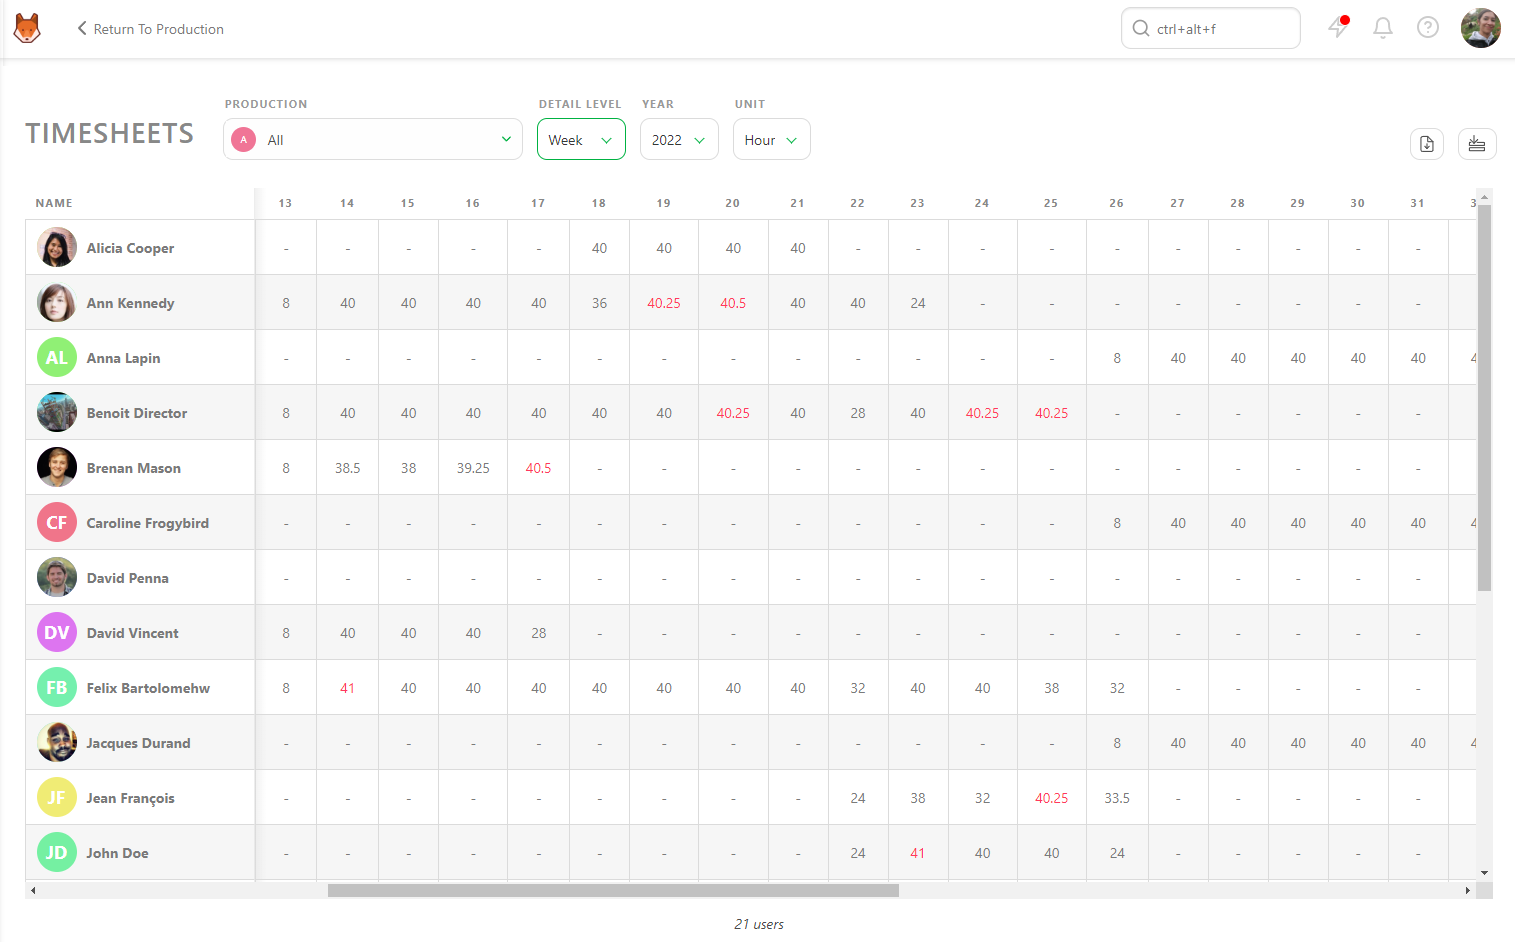
You can view all the productions you manage simultaneously or look at each production individually.
Exporting Timesheets
As with all other pages in Kitsu, you can export the timesheet data as a CSV file and open it in spreadsheet software for further analysis.
Complete Your Timesheet
If your production requires it, you can log your time spent using the Timesheets tab or the Timesheets shortcut button at the top of the screen.
How to Log Time:
- Use the slider next to each task to record hours spent.
- For quick input, use the 1, 4, or 8 hours buttons.
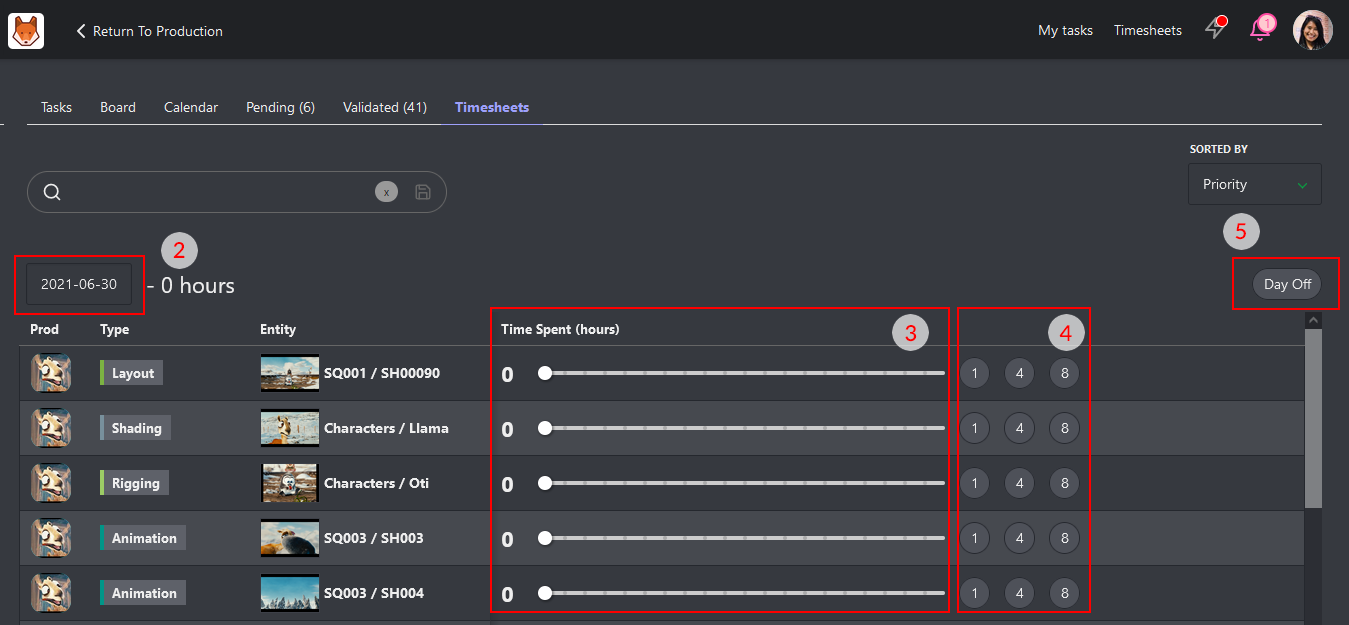
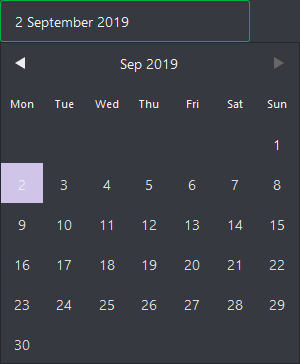
Missed a Day?
Click the date picker to backfill entries. You can also mark days as Day Off if you weren't working on that day.
Department Timesheets
As a Supervisor, you may also be responsible for monitoring your team's hours. The Timesheet page shows how many hours they work daily, weekly, and monthly.
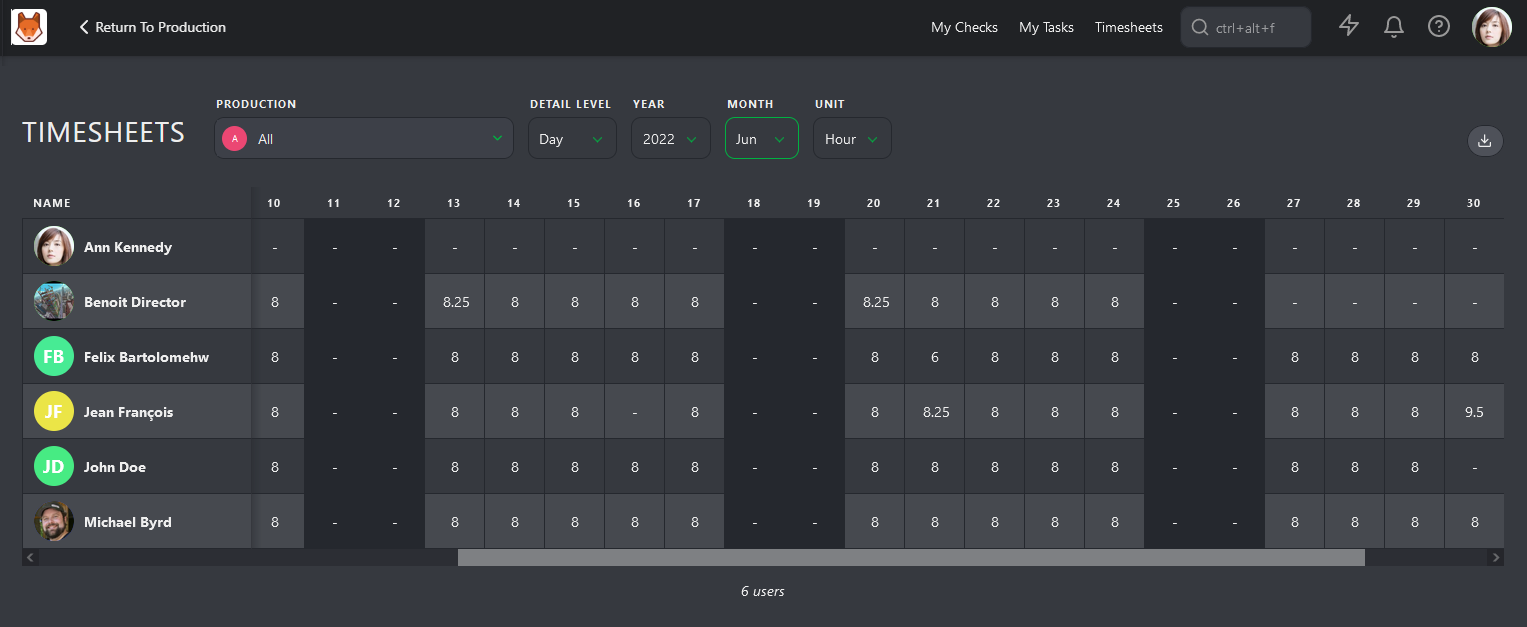
It's important to highlight abnormal patterns such as extra hours, sick days, or lack of vacation. The timesheet view can provide a high-level overview of where artists are spending their time, which can help you take care of your team to ensure they are not burning out.